


Brushing Up on Brilliance...
Almost Ready!
Almost Ready!

Explore how your car's parking system works
Product Designer
Front End Developer
3 weeks
Feb 2021 - Mar 2021
C++ programming
Soldering
Wiring
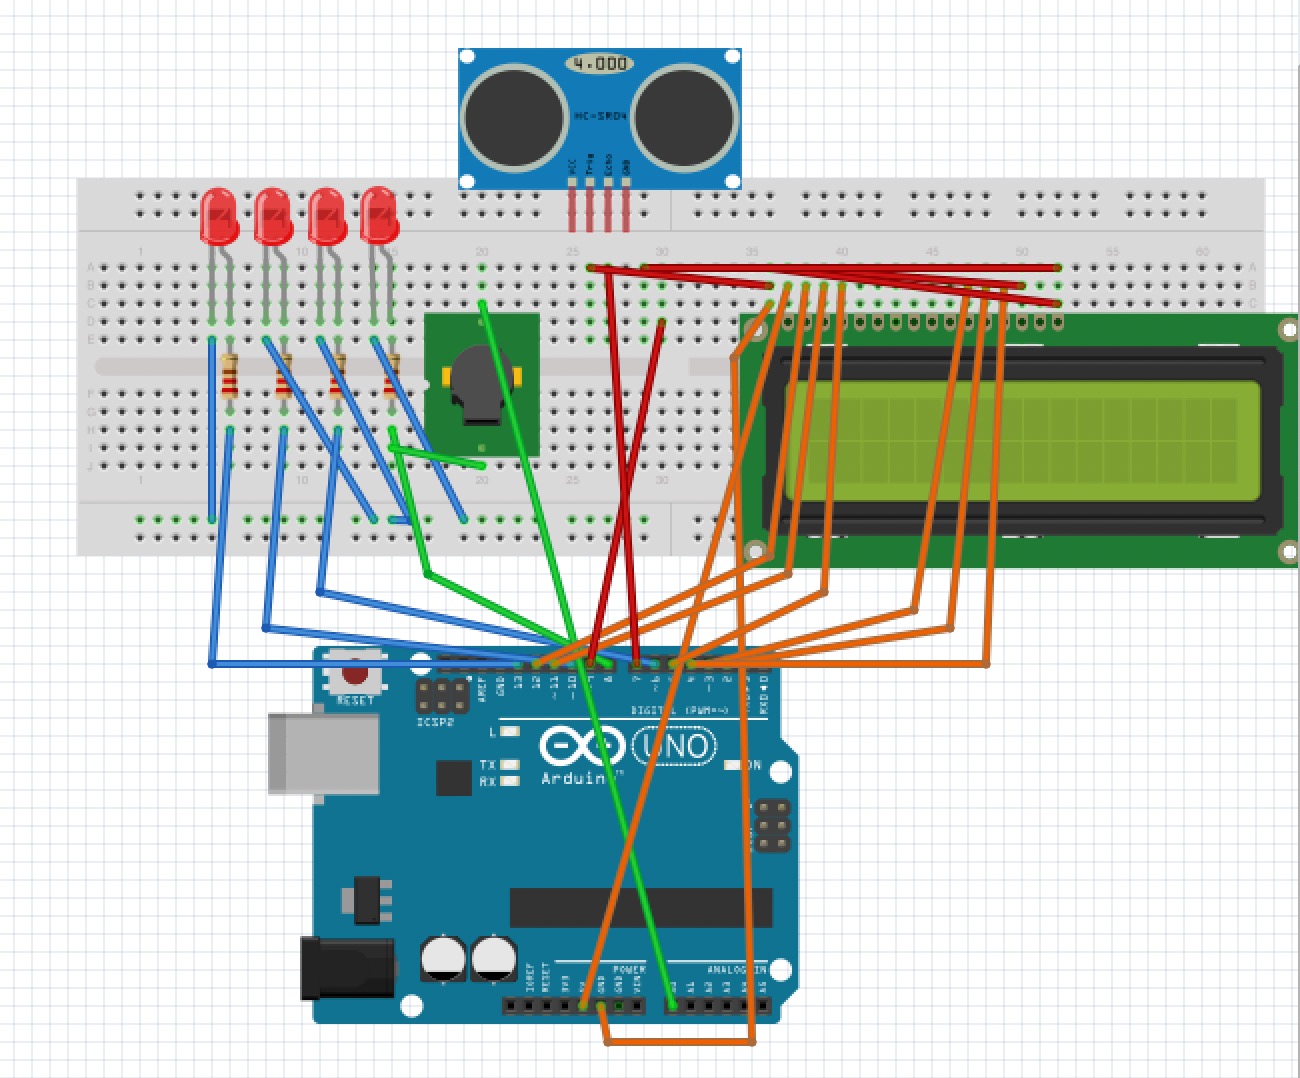
This gadget is for an ICAM(Interdisciplinary Computing and the Arts) project that I have done over the span of 3 weeks. The gadget is mainly composed of an ultrasonic sensor to calculate distance, LCD screen for display, LEDs for visual feedback, and buzzer for auditory signaling, all connected to an Arduino Board. It simulates a car parking alarm as it can estimate the distance to an obstacle and displayed in both “cm” and “inches” on the screen. The buzzer and the LEDs will also provide visual and auditory input to alert users. The making process was challenging but informative as I learnt how to solder, assemble and connect electronic pieces, and write code in C language in a short period of time.
“Beep….”, my car radar spoke pressingly to indicate that I couldn’t back up a centimeter further. With the assistance of my radar, I finally parked my car perfectly into the center of the lot. An idea suddenly jumped into my mind: the car parking radar system has been something I rely heavily on for parking but I have never thought of how it works. When I put the gear into P mode, the screen inside the car will display a real time image with lines outline to visualize the distance. There’s also a sound with frequency differences to warn me. If I am getting really close to an obstacle, the alarm will be beeping constantly and beeping less frequently if the object is far. I only know that there’s probably some kind of sensor in place to measure the distance, but I am not sure about the exact mechanism. With this goal in mind, I conducted lots of research on how the system works and I found out that I can actually implement it with an Arduino board and ultrasonic sensors. Thus I started on the deeper research of identifying the working mechanisms of the sensor and figuring out the schematics.
Tools & Materials

Experimentation
I watched a lot of tutorial videos online to figure out how to connect the ultrasonic sensor and the LCD with the Arduino board and first assembled it on a breadboard. After several rounds of trials, I am glad to find out that the set actually works. Then I decided to add a buzzer and LEDs to improve the look and feel of the gadget. After finalizing the materials I want to use, I drew a schematic graph with Fritzing to assist me with soldering.
Soldering
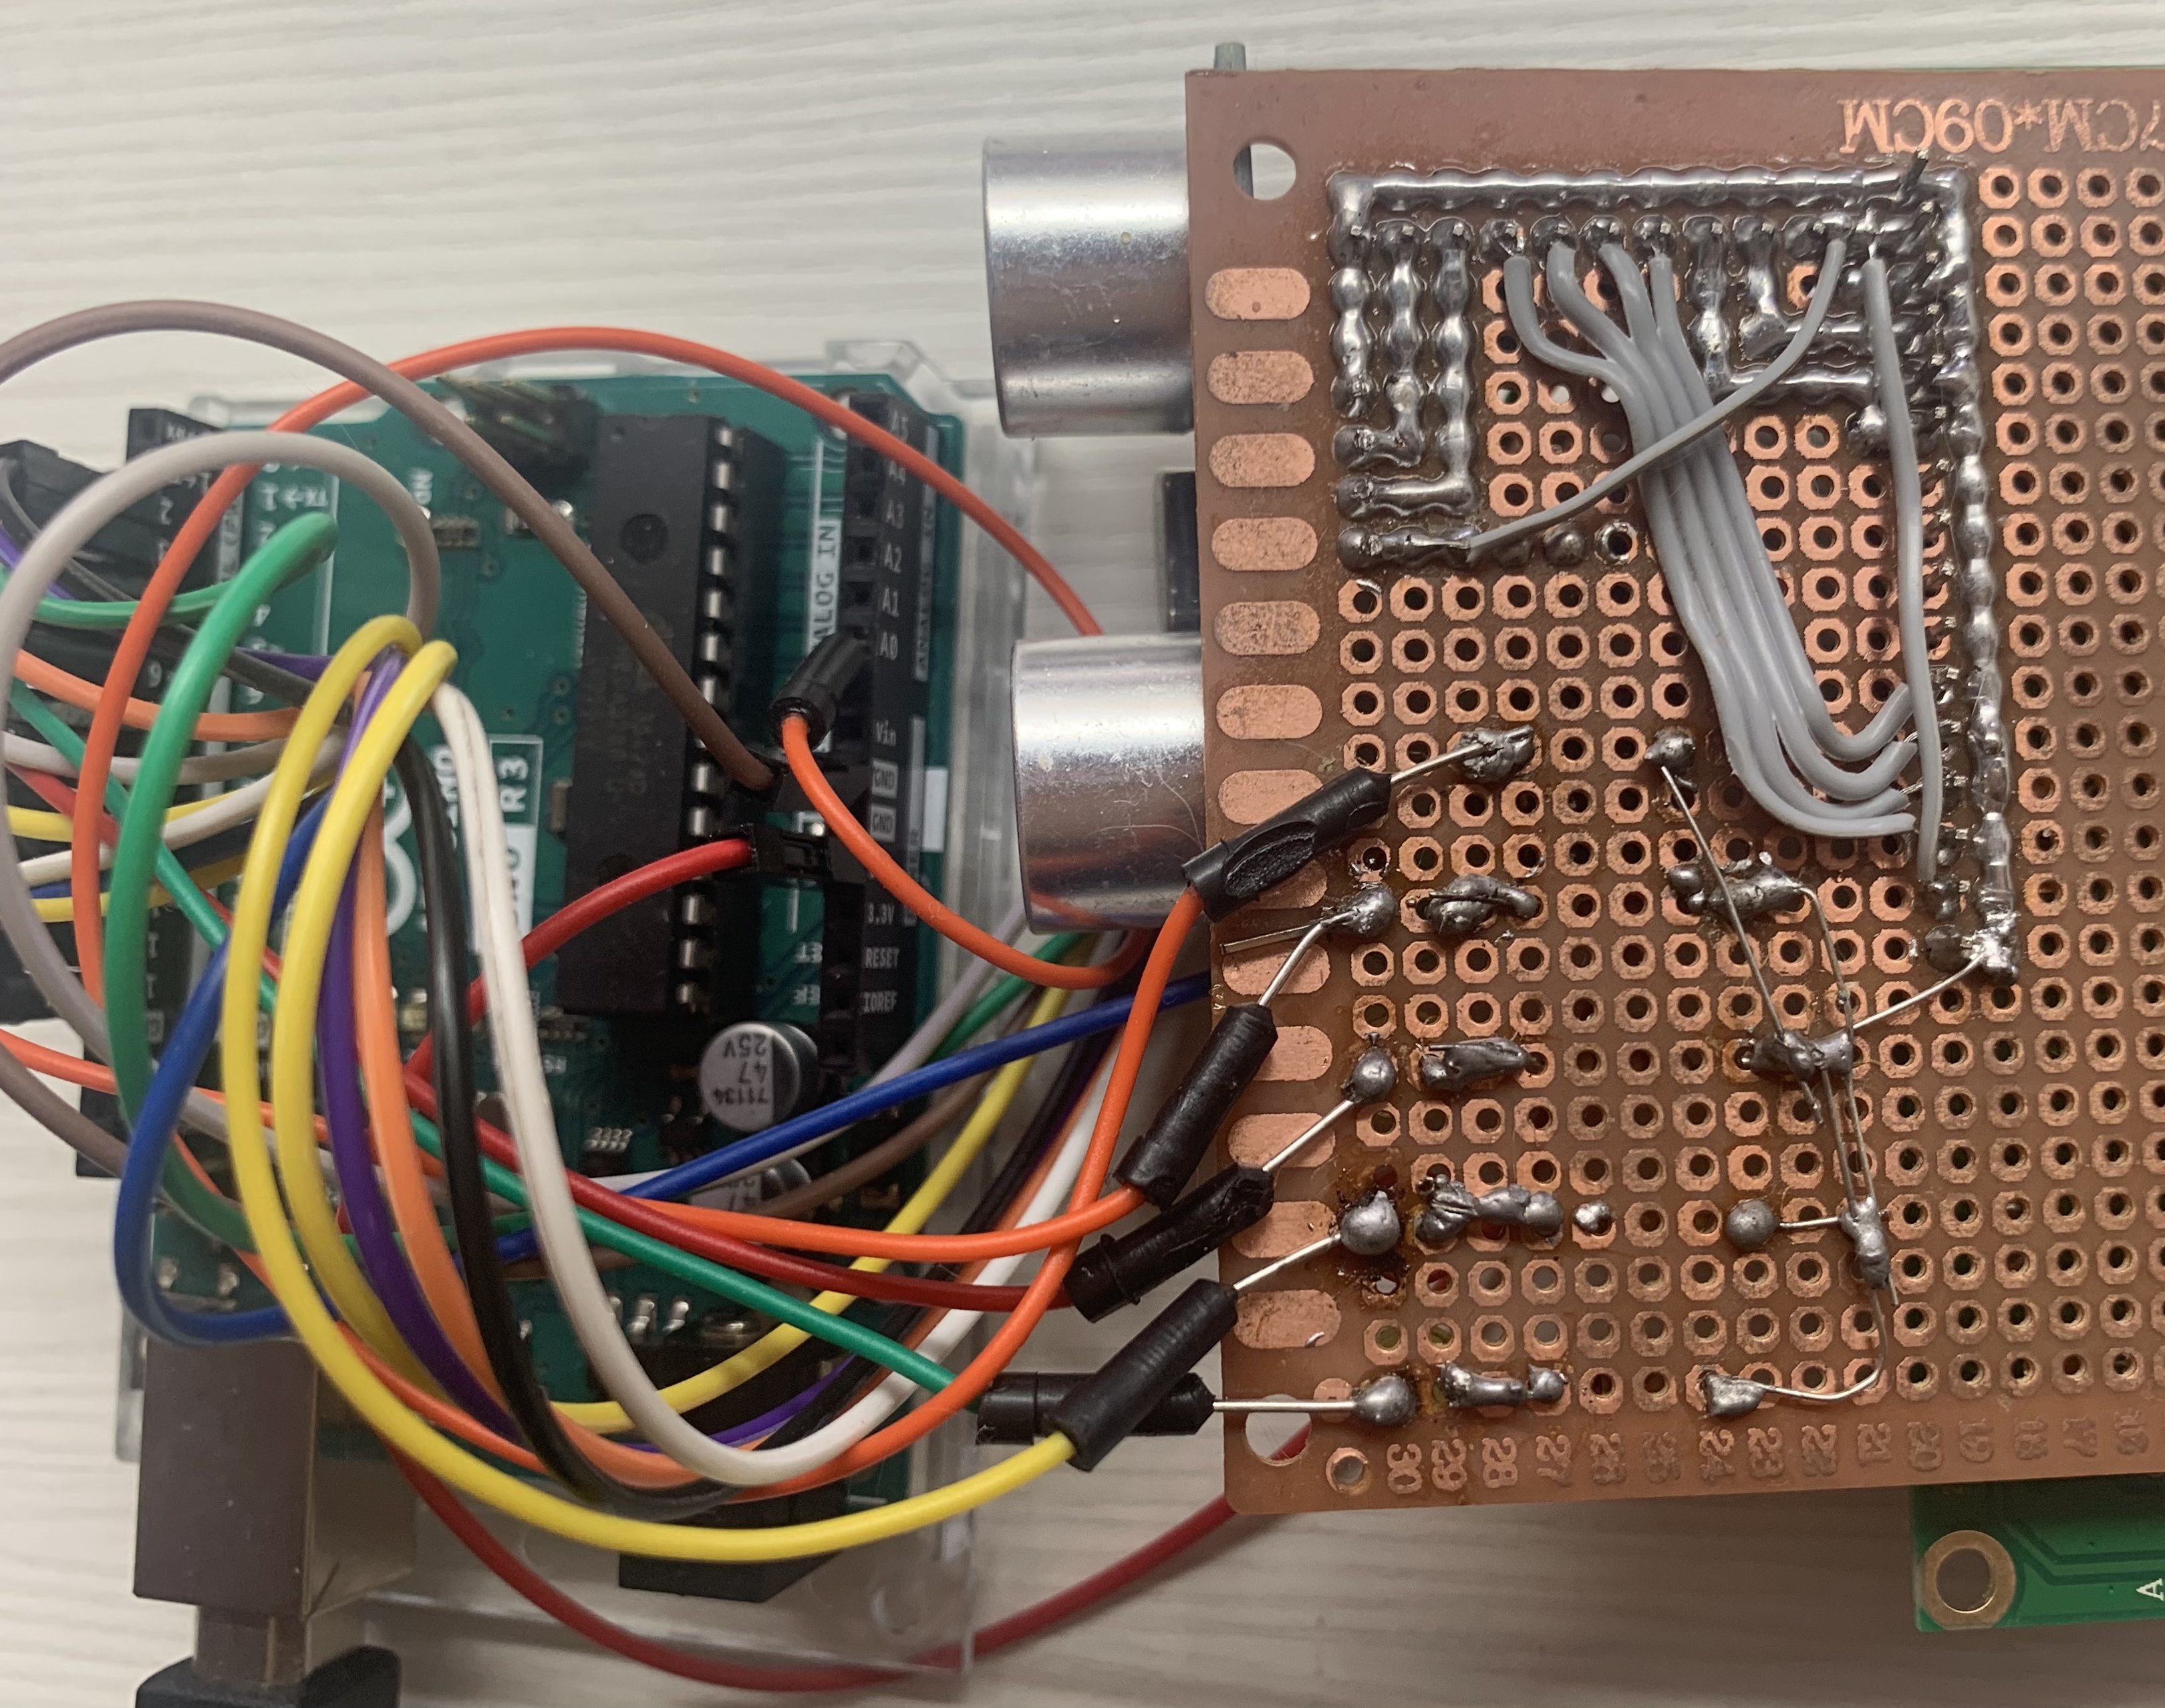
I actually experienced the biggest struggle in this step as I have no prior experience with soldering before. I started off with first laying out the orientation of the materials on the PCB board and soldered each individual piece first, then I use the Fritzing graph to figure out connections between parts and soldered in the connection wires. Finally, I soldered the jumper wires for connection to the Arduino Board. I made some faulty connections and found out that the circuit won’t work when testing with a multimeter so I had to start all over again. Although it was a bit frustrating at first, I could solder with ease in the second trial after gaining experience from the first trial.

Coding
I use the C/C++ language to write the code that corresponds distance from the obstacle to the beeping frequency and distance displayed on the LCD.

Testing & Iterations
I went on several iterations with the distance threshold and the graph displayed on the lcd screen. For the distance threshold, I tested it with other people to see how they feel about the relationship between the frequency of the beeping sound and the actual distance. I then adjust my code accordingly to obtain the most appropriate ranges.
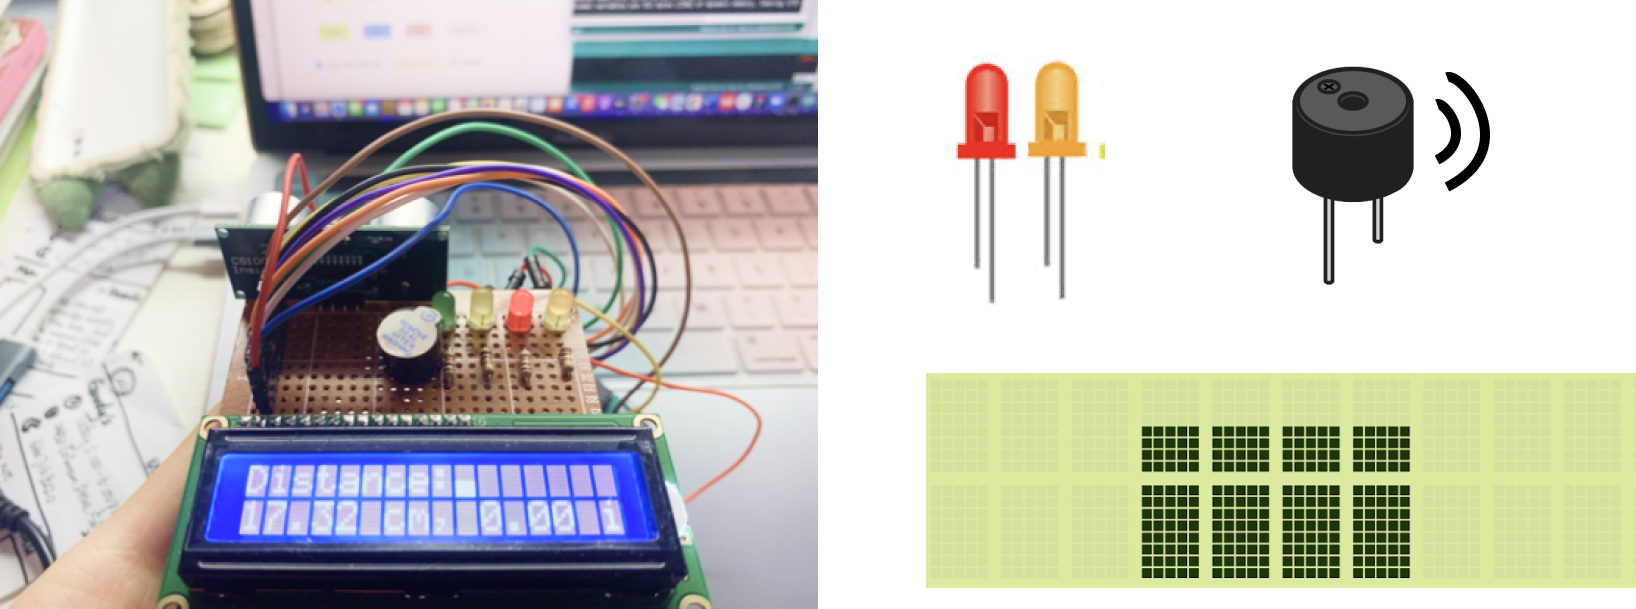
Iteration with Image on the LCD screnn
Second Try:
I tried to draw something similar to the WIFI signal, but my second attempt also failed as it’s still deemed unrecognizable.


First attempt:
I first try to draw an image that exactly mimics the parking screen on a real car. But testing shows that it’s hard to relate the image to the distance since it looks very abstract.
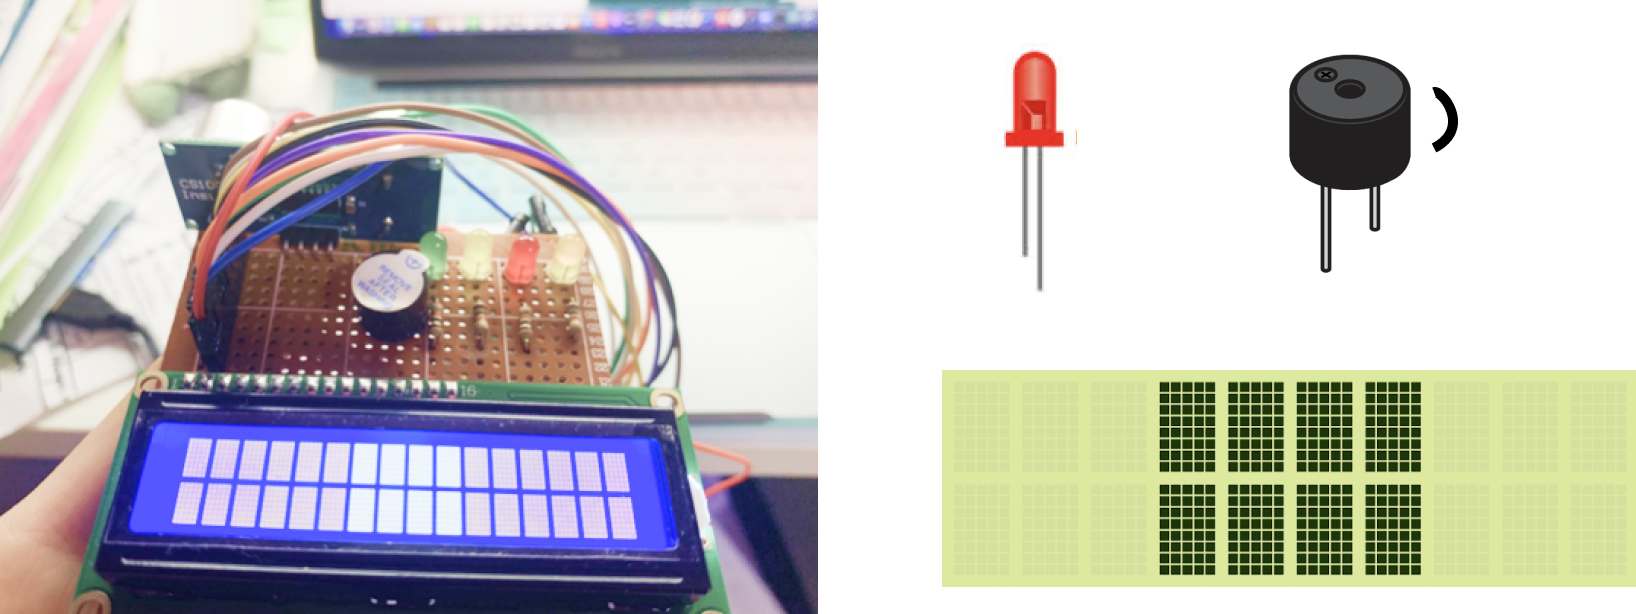
Last Round:
I decided to depict the level of the signal in terms of number of blocks displayed as further distances will have more blocks displayed while fewer blocks for closer distances. Although it’s still not the best solution, it’s the best I can think of currently. Refining the displaying method on the lcd can be something to be thinked about for future iterations.

The final product is a functional device with 3 core capabilities: the four LEDs will all light up if the object is really close and none will light up if the object is far, the buzzer will beep at very high frequency for near objects and low frequency for far objects, the LCD screen will display the distance in cm and in as well as an image similar to the actual car parking radar to visualize the degree of the signal. The distance and the image will be displayed alternatively at relative fast frequency for users to process both inputs simultaneously. Users can rely on either the visual, sensory or auditory input to judge the distance, or they can use all three to get more accurate and instant results.
Distance < 8cm
All LEDs will light up, the buzzer will beep at very high frequency and the image display shows there's limited distance left.

8cm <= Distance < 13 cm
3 LEDs will light up, the buzzer will beep at relatively high frequency and the image display shows the distance is very close.

13cm <= Distance < 20 cm
2 LEDs will light up, the buzzer will beep at lower frequency and the image display shows there's some space left to the obstacle.
20cm <= Distance < 50 cm
1 LEDs will light up, the buzzer will beep at very low frequency and the image display shows the distance to the obstacle is far.
Distance > 50 cm
No LEDs will light up, the buzzer won't beep and the image is displayed in full blocked.


.svg)